Deutsche Version
photoshop plugins
|

|
parameters
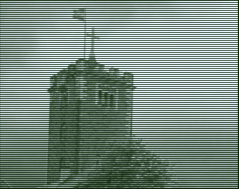
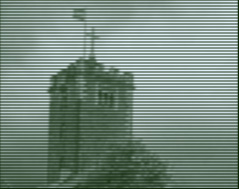
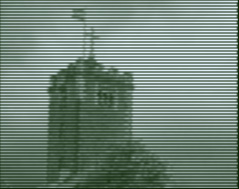
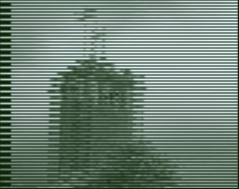
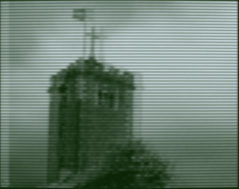
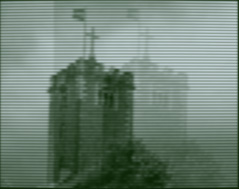
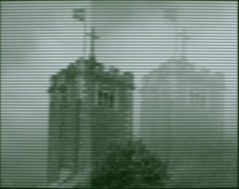
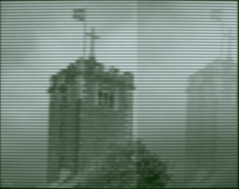
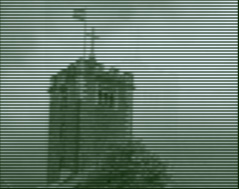
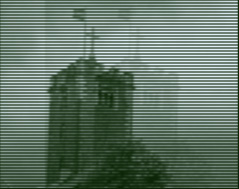
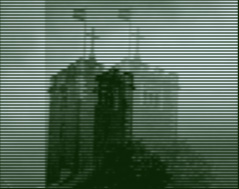
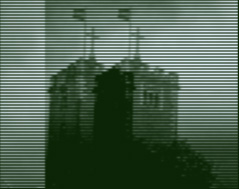
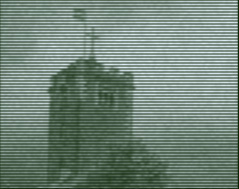
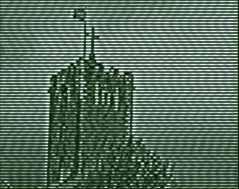
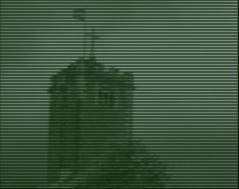
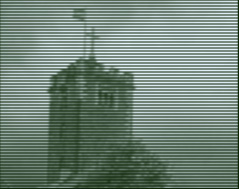
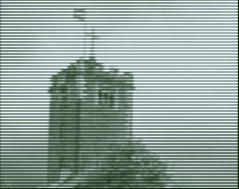
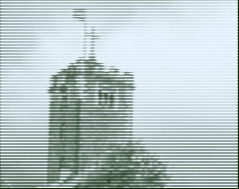
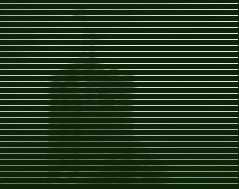
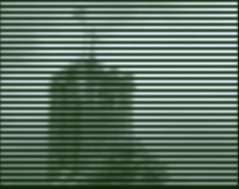
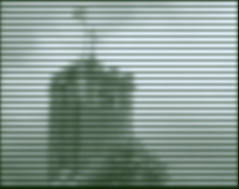
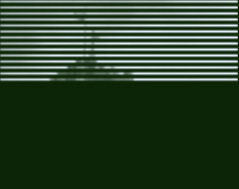
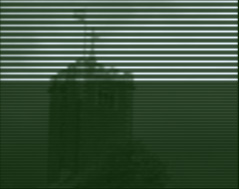
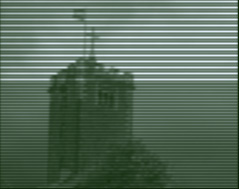
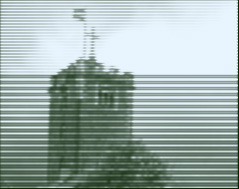
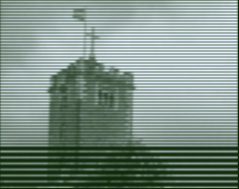
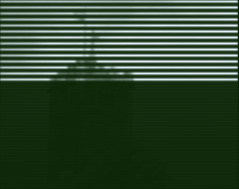
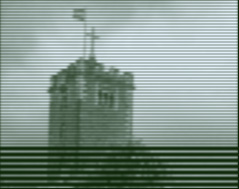
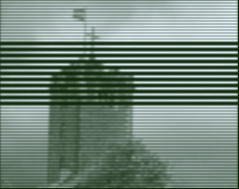
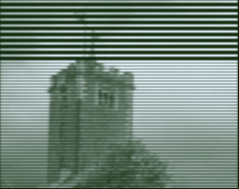
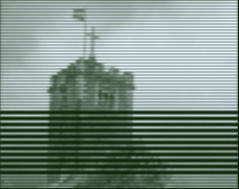
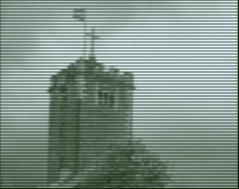
lines - number of scanlines
This paramters descripe the resolution of the image, how many scanlines the result will have.
Actually the number is the distance of the scanlines in pixels of the original image.
E.g. a "lines" value of 3 on image with a height of 189 simulates a screen with 63 scanlines.
A value of 1 gives actually no visible scanlines and no downsampling at all. Every original
pixel row is treated as a scanline directly.
|

|
|
lines = 2
|
lines = 4
|
|

|
|
lines = 8
|
lines = 16
|
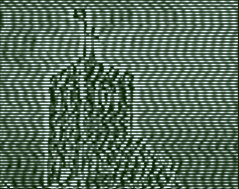
interlaced
The idea behind this parameter is to simulize the the effect when moving elements (in this case only the whole
image like on a camera pan) where each field of a frame differs slightly. Combined or photographed
it looks frayed. This is normmally an ugly effect for this replacement photoshops' "interlaced" filter was
invented. But nevertheless you can create it here.
A value of 0 means no interlace effect, a value of 1 or -1 means maximal effect. The sign show in which direction
the second field will be moved.
|
|
|
interlaced = 0.0
|
interlaced = +0.1
|

|
|
|
interlaced = +0.5
|
interlaced = -1.0
|
ghost distance
When the radio wave is reflected on large barrier like a mountain it reaches the receiver twice. Once the
direct signal and a litte bit delayed the reflection of it. It results in a double picture where the
reflection is less visible. Sometimes there are more than one reflections but this plugin supports only
one.
This paramter determines how much the ghost image signal is deleay. In practical terms how far the ghost image
is moved to the right. A paramter value of 0 means no right shift at all. A value of 1 means maximal shift.
|
|
|
ghost distance = 2
|
ghost distance = 12
|
|
|
|
ghost distance = 20
|
ghost distance = 30
|
ghost level
It's simply the level of the ghost image. A value of 0 means that there is no ghost image at all. A
value of 1 means the ghost image has the same level as the original image.
|
|
|
ghost level = 0.1
|
ghost level = 0.3
|
|
|
|
ghost level = 0.6
|
ghost level = 1.0
|
noise - noise level
This controls adds analogue noise to the signal. Just simply 0 means no noise, a value of 1 means only noise.
|
|
|
|
noise = 0.0
|
noise = 0.2
|
|
|
|
noise = 0.7
|
noise = 1.0
|
tuning - bad tuning
This parameter simulates a bad adjusted tuning. This is one of the most diffucult effects to simulate because
the visible effect are very different and are depeding from a lot of condictions. But nevertheless it is one
of the most importend ones to give the illusion of an old TV-set.
It simulates interferences, changed edges, reduced contrast and so on.
0 means no effect, a value of 1 means maximum effect.

|
|
|
tuning = 0.0
|
tuning = 0.2
|
|
|
|
tuning = 0.6
|
tuning = 1.0
|
sync - horzontal sync errors
This parameters simulates the effect that the horizontal sync flickers. This can be the case when a
voltage overlapped the horzontal sync signal.
0 means no effect, a value of 1 means maximum effect.
|

|
|
sync = 0.0
|
sync = 0.08
|
|
|
|
sync = 0.2
|
sync = 1.0
|
black level - brightness
This control is simply that what everybody knows as the brightness control on each tv-set or
monitor. Technically spoken it changes the black offset. A video signal value of 0.3V is defined as
absolute black. The lower voltages are reserved for sync signals. You could say they are blacker than black.
This controls changes this offset. You never need the technical details: its just a brightness control...
Greater values than 0 makes the image brighter, lower values darker.
|

|
|
black level = -0.3
|
black level = 0
|
|
|
|
black level = 0.3
|
black level = 1.0
|
video level - contrast
The well know contrast control defines the amplification of the video signal. For you it's just a
contrast control.
Not simluated is the effect that normally a brighter image results in a worser focus. You can adjust
this independently with the focus control.
Values greater than 1 increases the contrast, values smaller than 1 decreases it.
|
|
|
video level = 0.5
|
video level = 1.0
|
|
|
|
video level = 1.4
|
video level = 2.0
|
focus
With the focus control you can adjust the focus of the electron ray.
A value of 0 means the ray keeps as focused as possible, it will only have a width of one pixel.
Using a value of 1 means that the ray is maximal defocused. The light point is smeared over several lines.
It will make the images unsharp, of course. With a medium value the single scanlines are blended together,
the stripy look will disappear.
|
|
|
focus = 0.0 (lines = 6)
|
focus = 0.4 (lines = 6)
|
|
|
|
focus = 0.6 (lines = 6)
|
focus = 1.0 (lines = 6)
|
glow - screen after glow
This paramter defines how much the screen glows. Since we have no moving pictures it has only a effect
when using the photo effects decriped below.
0 - no glow at all, 1 - the glow is as bright as the original image. (a infinite glow)
|
|
|
glow = 0.0 (time = 1/125s)
|
glow = 0.2 (time = 1/125s)
|
|
|
|
glow = 0.5 (time = 1/125s)
|
glow = 1.0 (time = 1/125s)
|
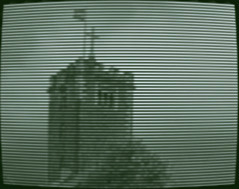
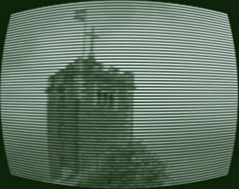
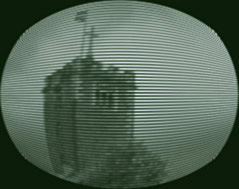
screen bulge
A vintage screen is not a flat screen...
With this control you can adjust the bulge of a such a cathode tube screen.
0 - a flat screen, 1 - minimal radius.
You notice that the bulged images are slightly more unsharp. This is because of the
downsampling and lowpassfiltering during the transformation. Otherwise you'll get nasty
moiree effects. It is a good compromise between unsharpness and moiree.
You can easely sharpen it or blur it with photoshop if you want.

|
|
|
screen bulge = 0.0
|
screen bulge = 0.4
|
|
|
|
screen bulge = 0.7
|
screen bulge = 1.0
|
photo time - exposure time
Normal exposure times on a photographic camera are not compatible with the 1/25s of a normal PAL-frame nor
with a 1/50s PAL-field. Depending on the exposure time not all scanlines will be written or sometimes even twice.
Everybody knows the darker bars in screen photos. With this control the exposure time is choosen.
(no effect, 1/15s, 1/30s, 1/60s, 1/125s)
With the glow control you can make daker lines visible as well.
|
|
|
exposure time = 1/15s
|
exposure time = 1/30s
|

|
|
|
exposure time = 1/60s
|
exposure time = 1/125s
|
photo offset - time offset of exposure
The exposure time (see photo time) start normally in sync with the image. With this control you can
change the time offset between (simaluted) image writing and (simulated) photo taking.
|
|
|
offset = 0.0 (exposure time = 1/30s)
|
offset = 0.3 (exposure time = 1/30s)
|
|
|
|
offset = 0.7 (exposure time = 1/30s)
|
offset = 1.0 (exposure time = 1/30s)
|
colormode
This plug in offers 4 different colormodes.
normal
In normal mode the screen is rendered in more or less realistic color. Where the screen is a very dark green
instead of black and the phosphoric luminiscense of the electron ray is sligthly bluish instead of
white. This shall produce the colors of a black and white TV-set whe the eyes are adapted to tungsten light in
the evening. This mode is only avaiable if the colormode of image is RGB.
bw - black and white
Simply black and white. This mode is always avaible and default if the colormode of image is grayscale.
ps - photoshop
In this mode the color of the screen is the current backgroundcolor in photoshop and the ray color is the color
of the current foregroundcolor.
trans - transparent
In this mode the screen is transparent and the foreground white. (you can easely color it yourself when you want)
This mode is only avaiable when the filter is applied on non background layers.
|
|
|
color
|
black/white
|

|
|
|
photoshop (fg=yellow, bg=dark blue)
|
transparent (unsharp original shines through)
|
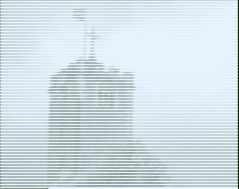
text mode
The text mode offers a slightly different behaviour. This is especially useful when processing bright text.
(see examples, picture 1, too) There are two differences to the normal mode:
Noise and Interferences will not appear in areas which are dark. They will applied only on the text itself.
And the ghost image is added directly. Like a simple addition.
Text must be bright on dark groud of course for that. For postive text (dark letters on bright ground) it's
better to use normal mode.

|
|
normal mode
|

|
|
text mode
|
|
|
|
|
|
|
